Crafts
Wet Bar Renovation!
If you’re following my blog, you’ve probably noticed I almost constantly have some kind of home project going on! I love our family room and we’ve done a lot of updates to it since moving in. The last remaining area to update (really in our entire downstairs) was the wet bar.
This thing, in my very critical opinion, was a huge eyesore. It was most definitely stuck in 1980…in a bad bad way. So, I’ve been contemplating how to renovate it. Getting around to installing granite is taking longer than I had thought so I wanted a more temporary fix. I spend a lot of time in the family room and stare at the bar A LOT! I started looking at countertop renovation kits but wasn’t impressed with most. Then, I stumbled upon a very interesting company called Giani Granite. They have a countertop paint kit that literally looks like granite. I figured what do I have to lose. I reached out to the company and they were nice enough to send me a free kit in exchange for a review on my blog. Happy to do so and how cool is that?!
I promise this review will be honest, no biased reviews simply because they gave me the kit. I will say, I am very impressed. It looks amazing and my skeptical husband was blown away with the results too! See below for a step by step review. I decided to add a few more updates to spruce the area up too, and those are outlined below as well. Enjoy!
First things first, here’s a photo of everything you receive in the Giani Granite Countertop Paint Kit. They even include all your brushes and rollers! I purposely took this photo on our real granite countertops in the kitchen so you can see how similar the painted countertop looks to this one.

Step 1: Tape the edges of your countertop and sink.
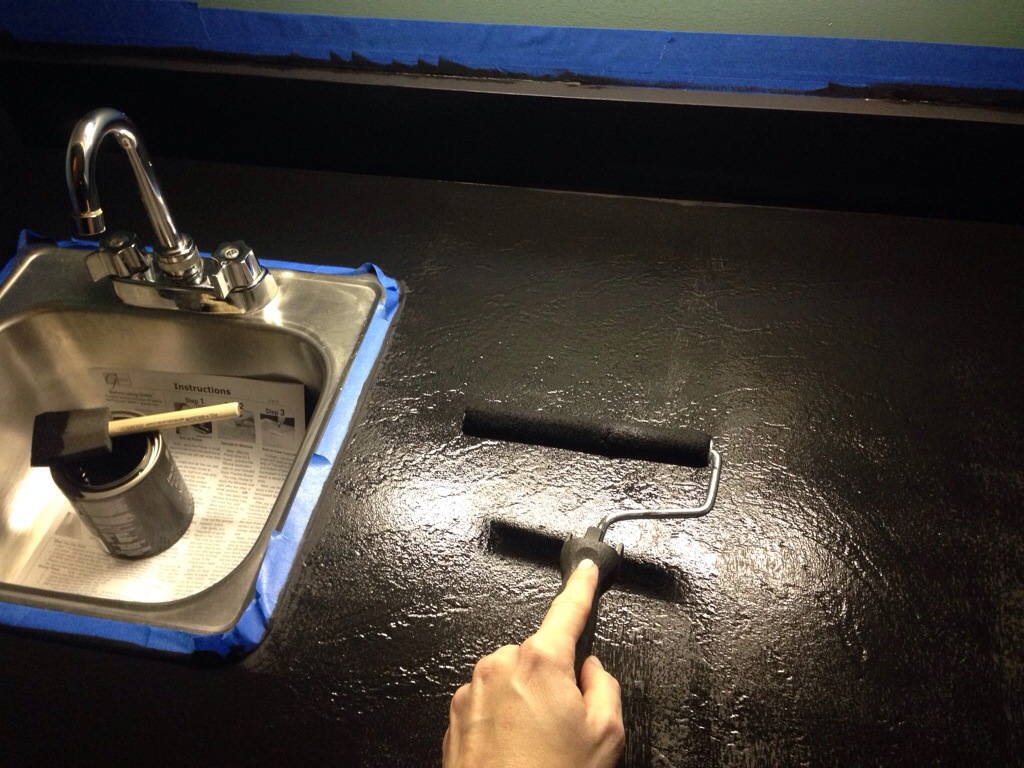
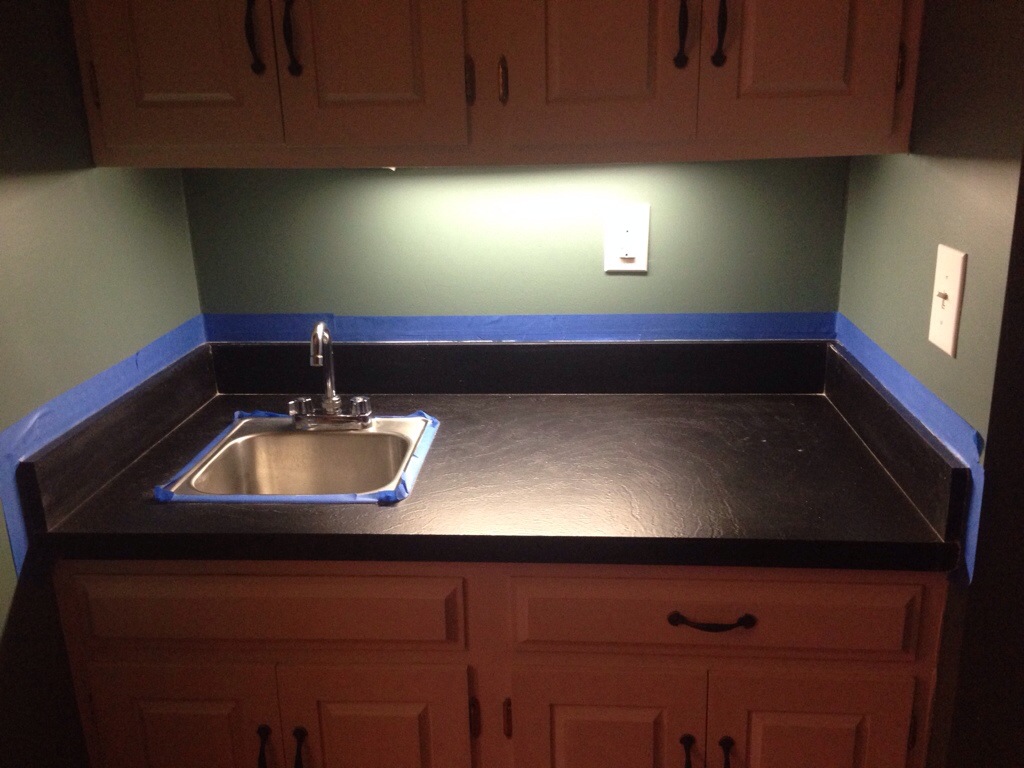 Step 2: Roll on primer and wait at least 4 hours for next step.
 Step 3: Be sure to use the included foam brush for your backsplash.
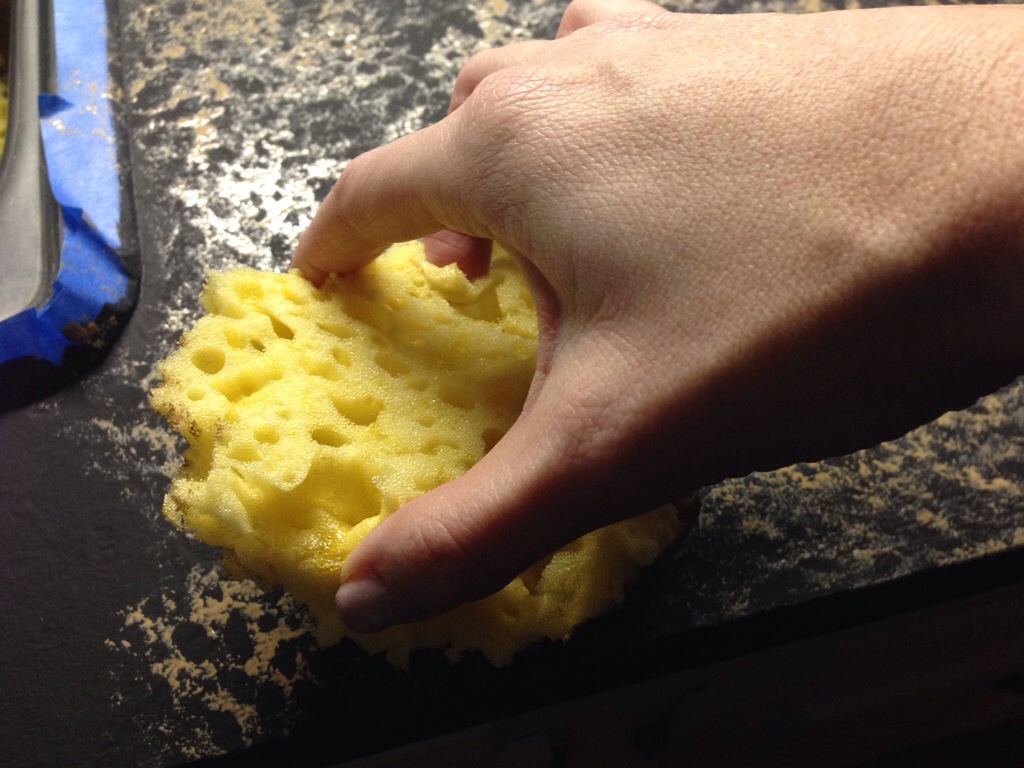
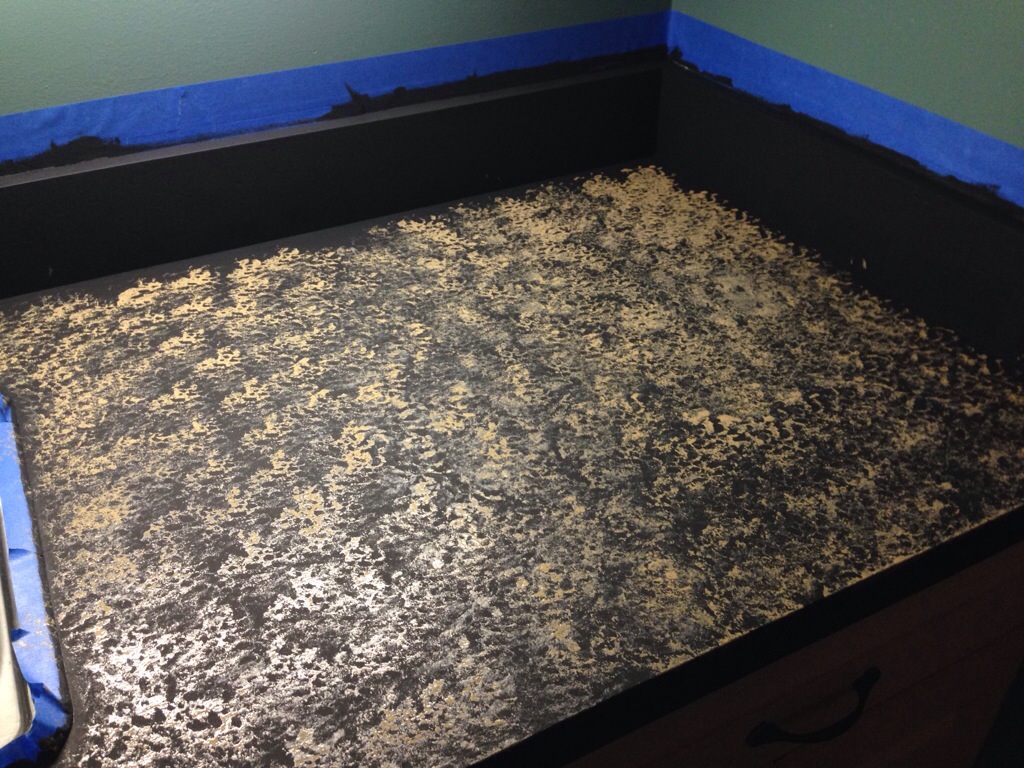
 Step 4: Once primer has thoroughly dried, cut your sponge into three pieces. Two larger pieces and one smaller for use in corners. Then, dip your sponge in your minerals and sponge onto countertop, following the instructions on proper overlap. A few things to note here- I completely covered the counter with each individual color and let it dry before moving on to apply second and third color. You can do them all at the same time in small working areas while wet too. Be sure to tap your sponge on the included practice board to remove excess paint. This is VERY important to make it look even.
 Here’s a photo after the minerals were all applied.
 In my opinion, the hardest part of the entire process was blending the corners where the backsplash meets the counter. The main area looks surprisingly just like granite but the edges were tricky. The instructions recommend taking a small piece of sponge and wrapping it around a pencil to press into the edges. This did not work well for me, so I instead used a tiny brush to mimick the pattern. This worked much better for me.
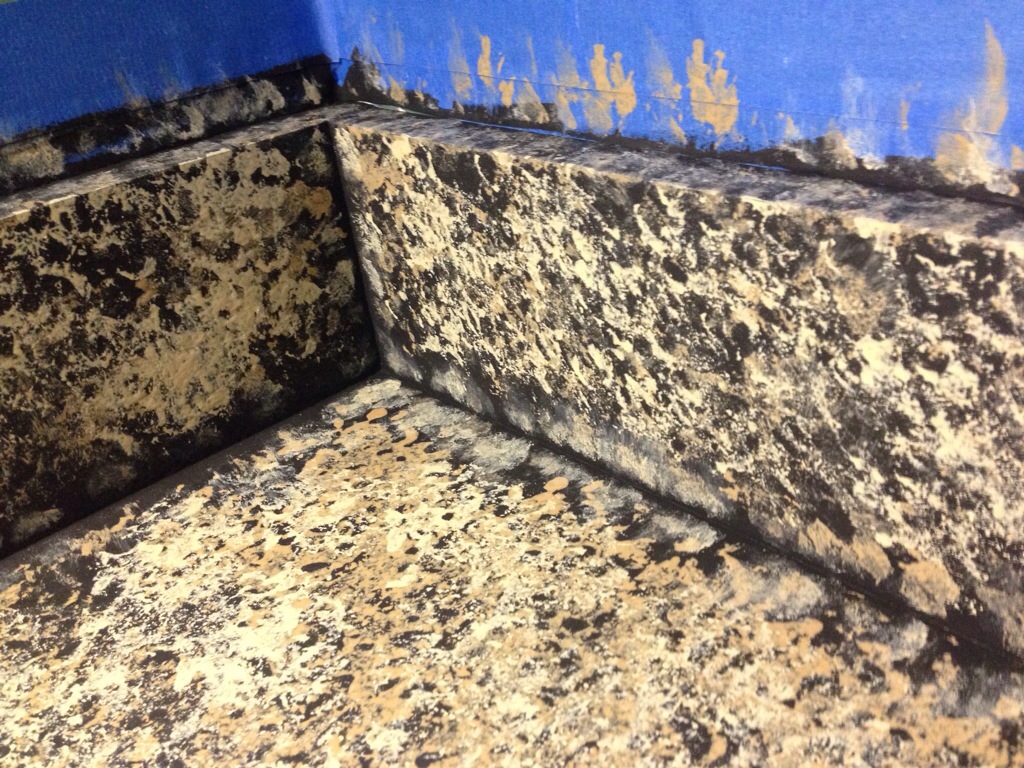 Here is a pic of me using the brush technique mentioned above.
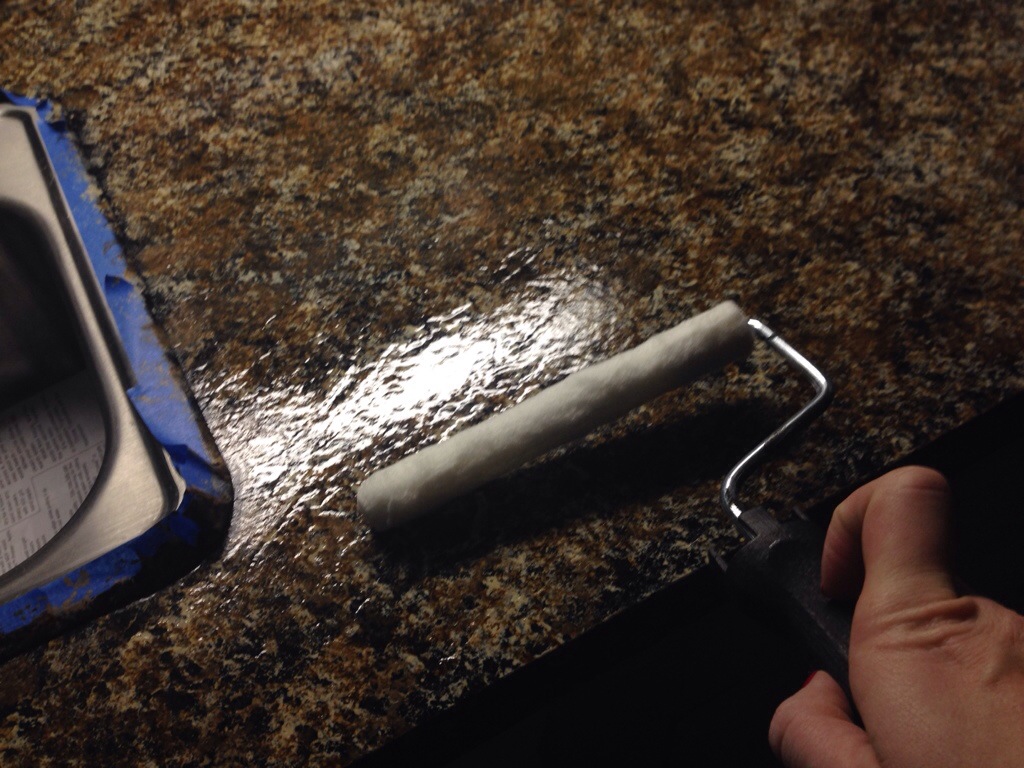
 After your mineral paint has dried thoroughly, you are then ready to apply your first coat of polyurethane. I allowed each coat of polyurethane to dry eight hours before applying the next coat. I applied a total of three coats.
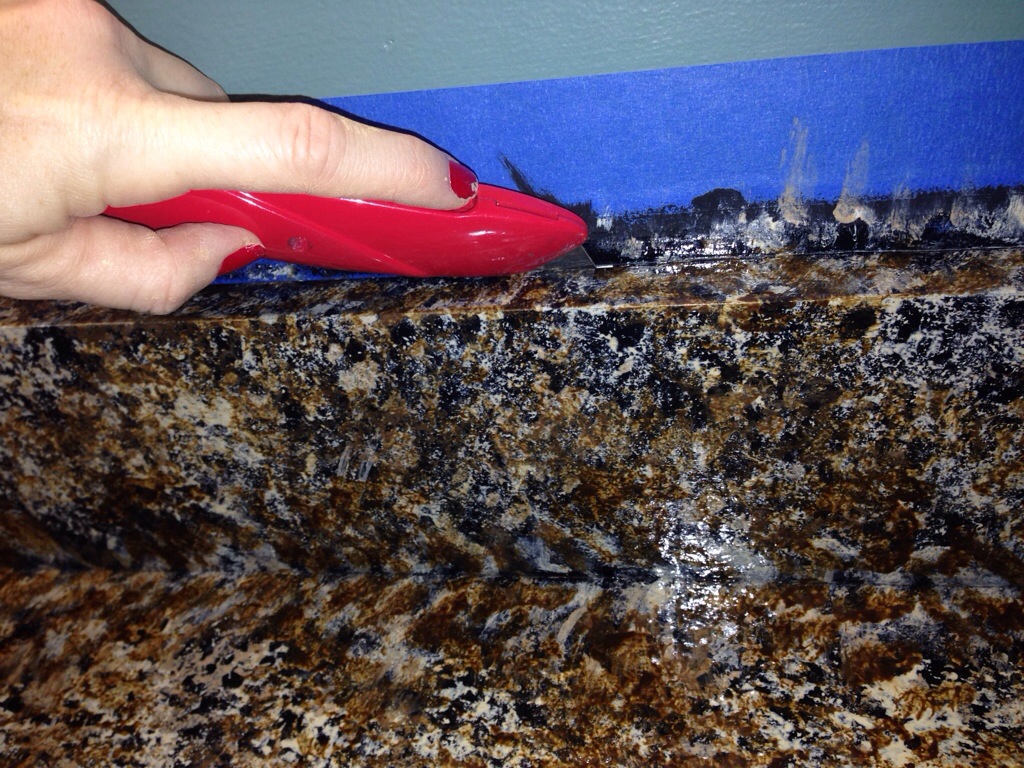
 One hour after you apply your third coat, please take a utility knife and score the edges of your tape. This is VERY important. Once scored, carefully remove all your tape.
 Wait three days before using the counter and fourteen days before putting appliances, etc. on the countertop. This wasn’t much of an inconvenience since we don’t use this sink every day.
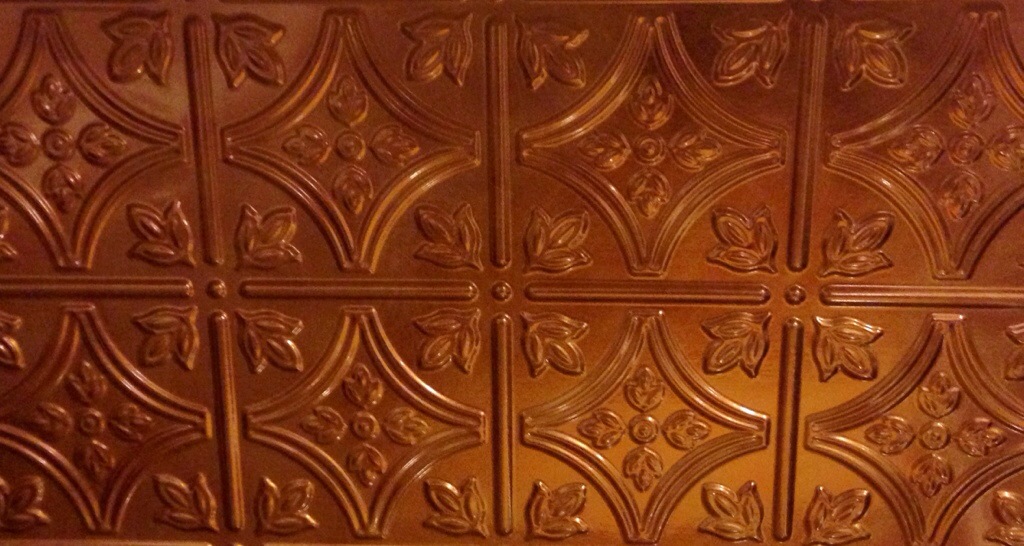
 I was so happy with how my countertop renovation turned out that I continued updating the rest of the wet bar area! I found this gorgeous copper colored backsplash at Home Depot. I’ve been curious about these backsplashes for awhile now. Fasade Backsplash
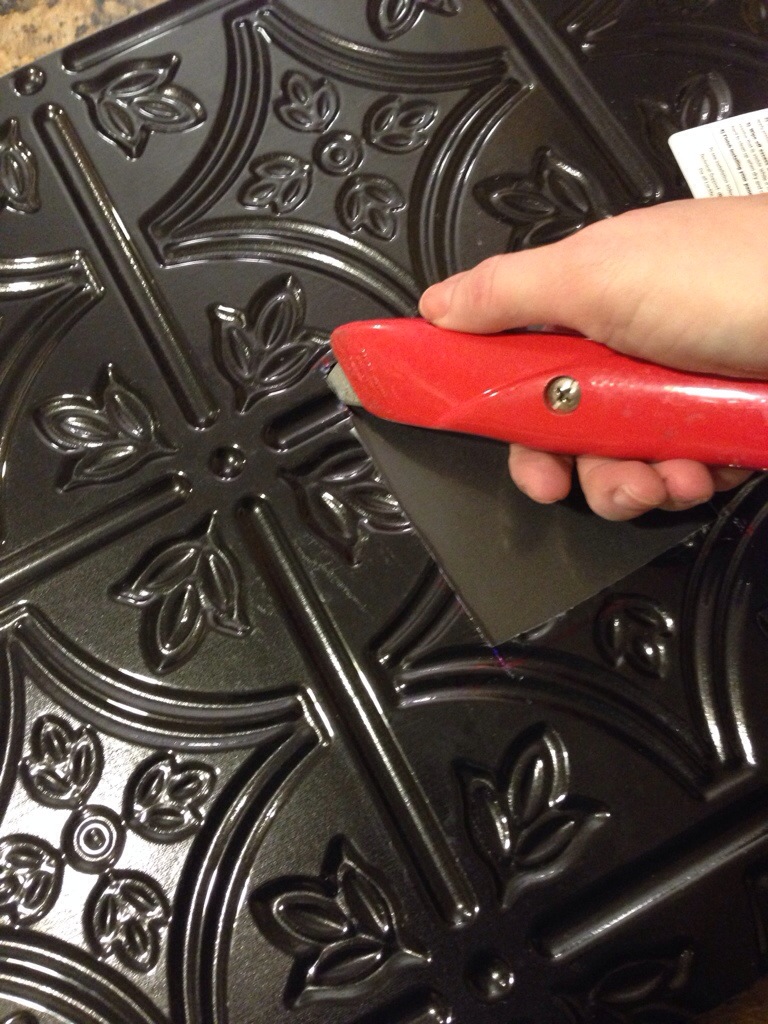
 This was a surprisingly easy project. I did the whole backsplash installation in less than half an hour! Step 1: Measure your backsplash area to determine where to cut holes for electrical outlets, etc.
 Step 2: Apply double-sided tape to the back of the backsplash.
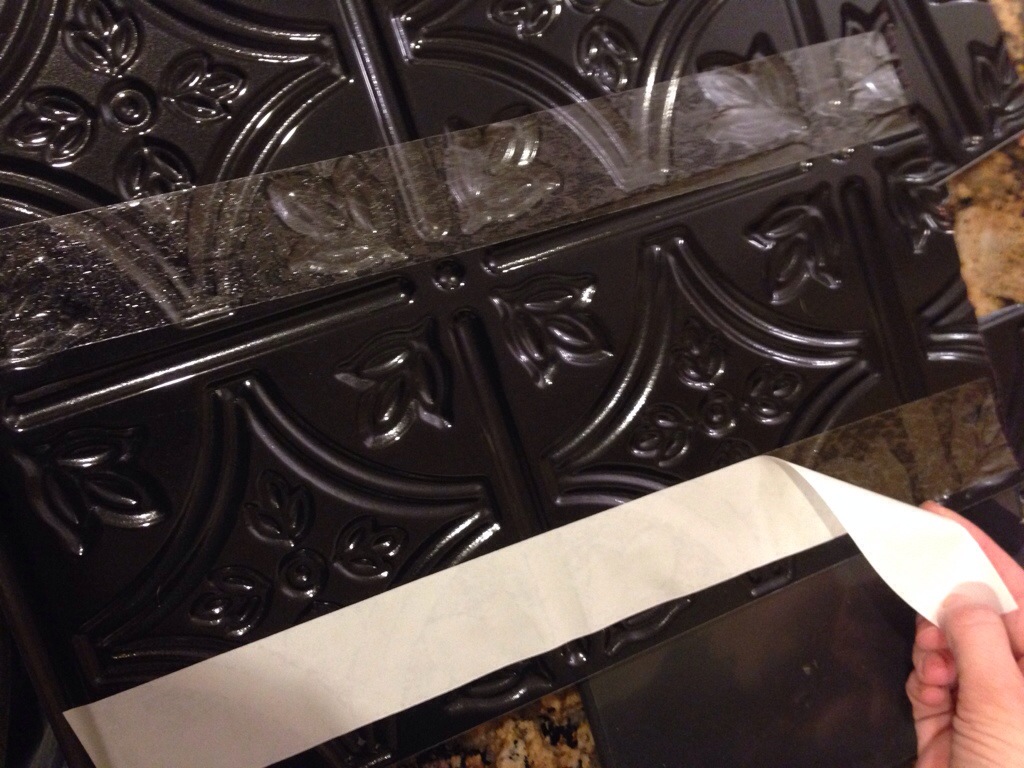
 Step 3: Once secured, peel back from tape to reveal sticky side.
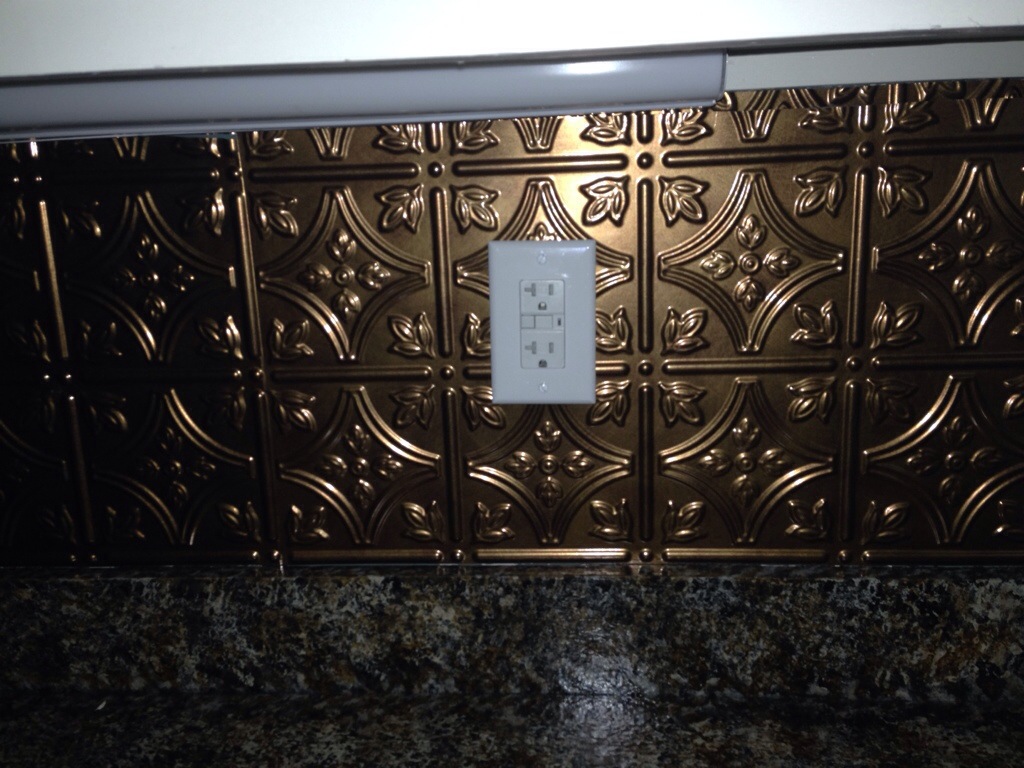
 Step 4: Carefully stick the backsplash to your wall and press to secure it. Then replace all your outlet covers.
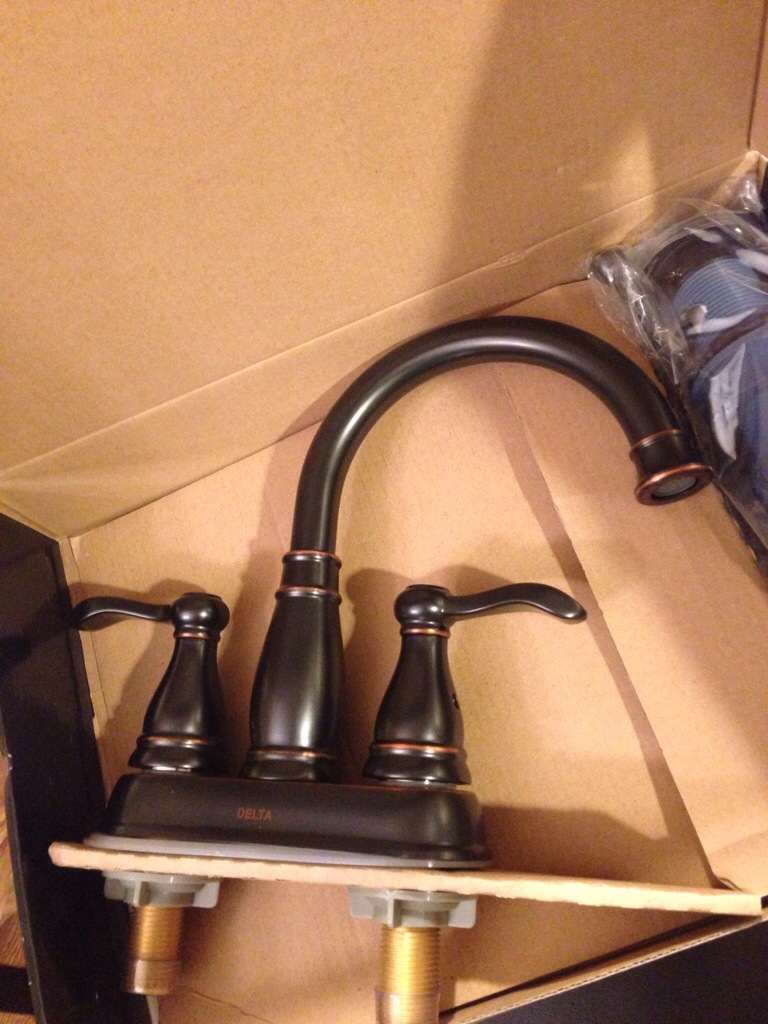
 I also wanted to update our faucet and bring it into the year 2014. I chose oiled bronze to tie in the backsplash color.
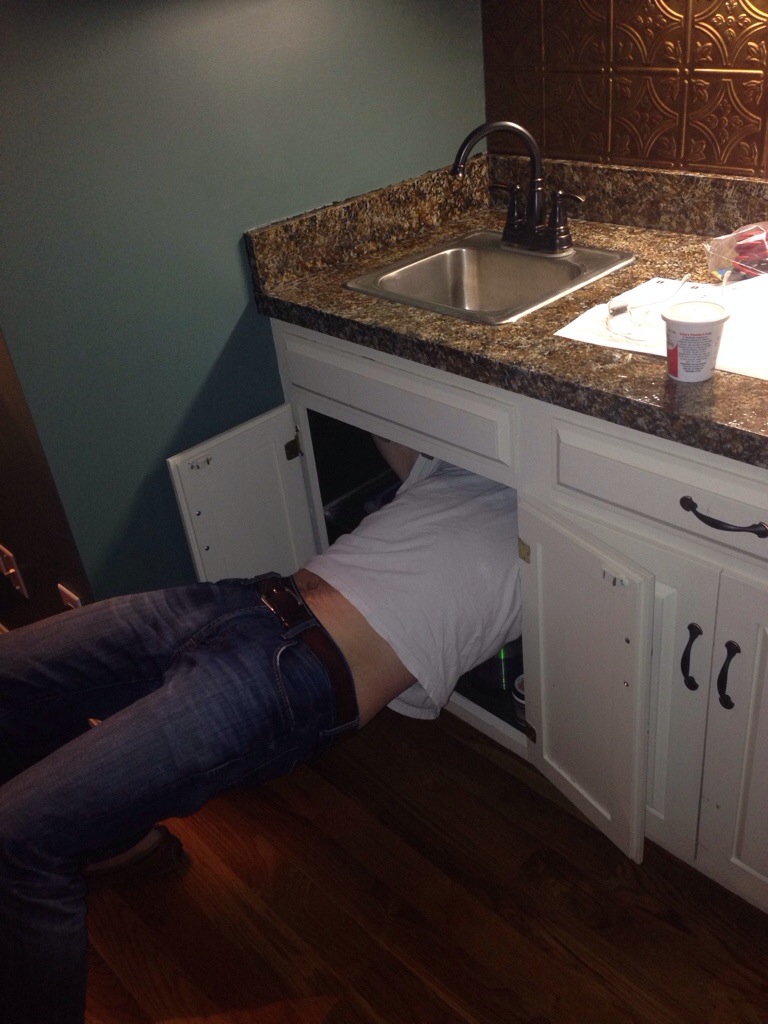
 This is the one task my husband had to help with. It should have been a half hour project but thanks to old plumbing it took several hours and lots of back pain. Oops! Thankful to have him.
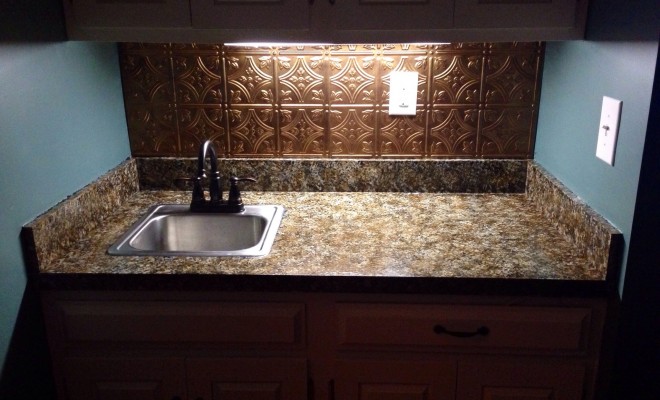
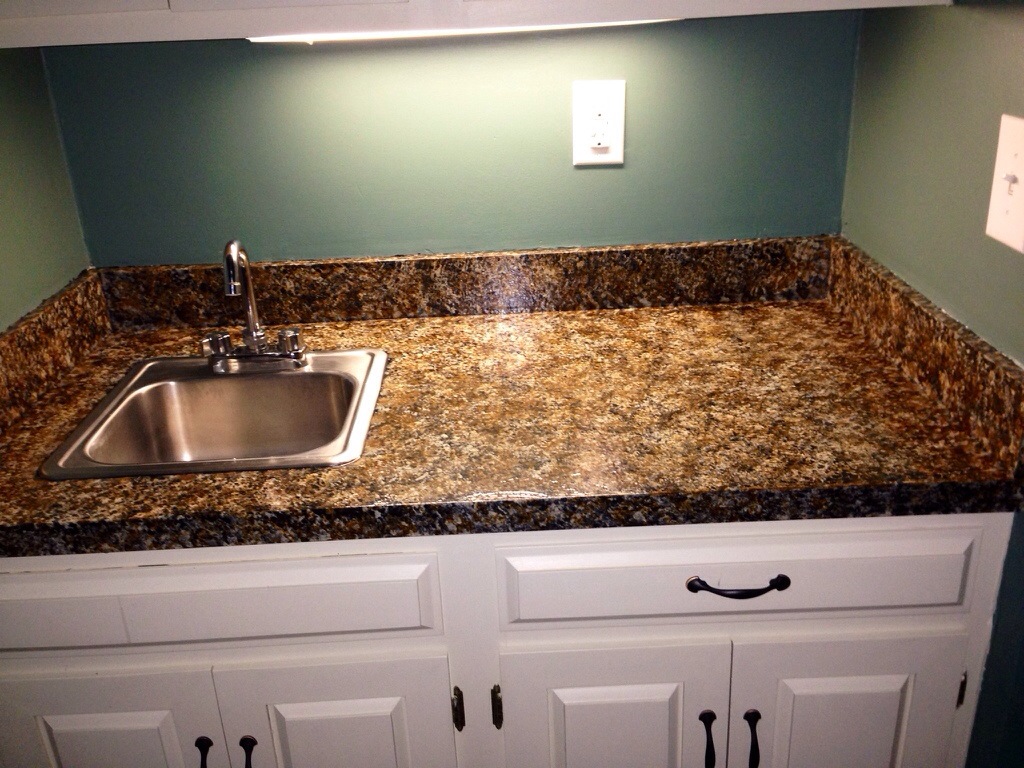
 Ta-da!!!! Here it is- the new and improved wet bar! I actually LOVE this little area now.

Thank you Giani Granite for the free product. It definitely exceeded my expectations, which is always a great outcome! Be sure to follow Giani Granite:
Giani Granite Facebook Page
Giani Granite Pinterest Page
0 comments