Crafts
Operation “Refinish the Hardwood Staircase”

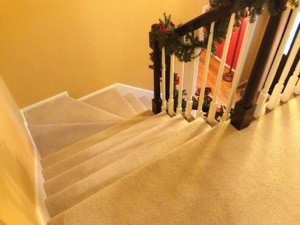
We bought our first home together in April 2012, after getting married in November 2011. We truly love our home and got very lucky as many things had been updated before we purchased. It’s a colonial style home around 30 years old. One thing that was new was carpet throughout the upstairs and the staircase itself. I can’t help it, I hate carpet. The downstairs thankfully is all hardwood.
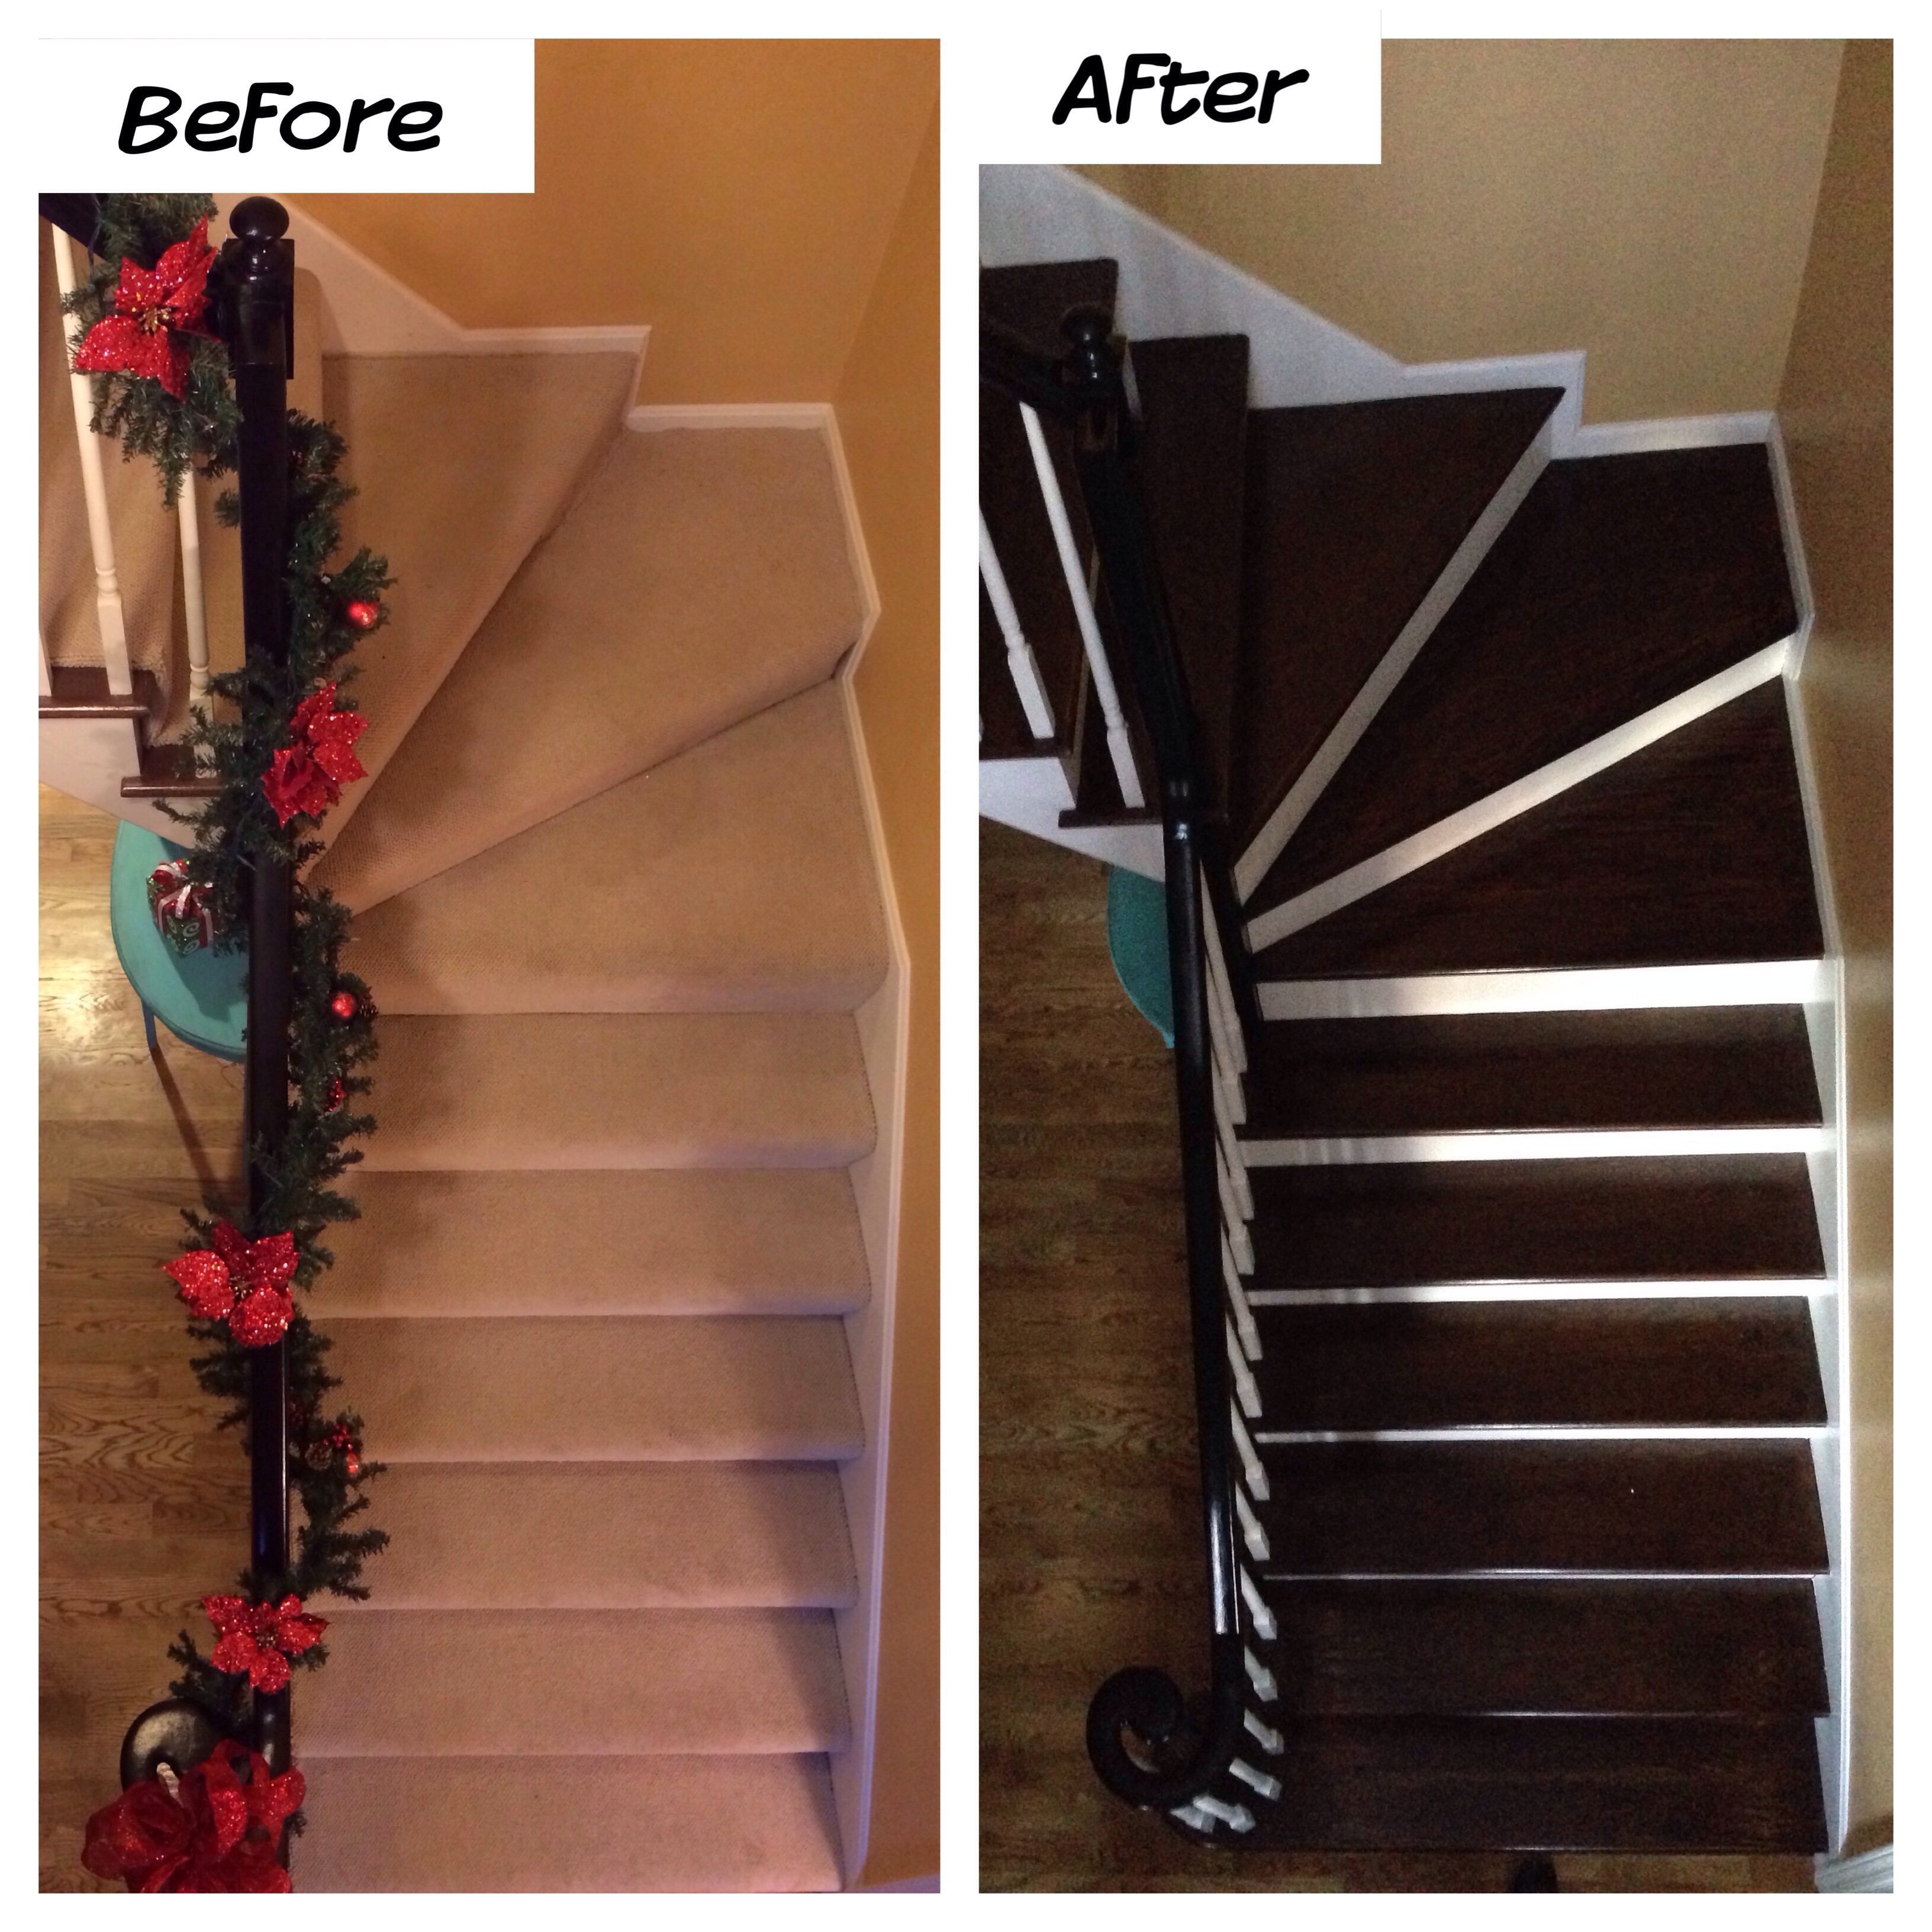
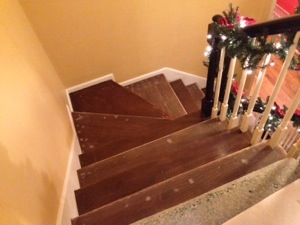
So while the carpet is a nice upgraded carpet and new, I was dying to know if there was hardwood stairs hidden under there. My dad, mister handyman himself bet there were. So fast forward 20 months later and I’ve finally decided to pull back the carpet on the stairs and take a peek- this took some courage as I was worried I’d rip the carpet or something. To my delight they were all hardwood! Who would cover them up?! Completely!!!?? And friends, pull that carpet back if you’re curious….it easily lays right back down. 😉
So I thought I’d do a post to show my transformation and try to include some of my steps. I’m proud to say I’ve done this entire project without any help from my hubby!
Scroll to the bottom to see before, during and after (to come soon) photos. I’m not quite done but wanted to share what’s done so far, as this time consuming (but worthwhile) project has slowed down my blog posts!
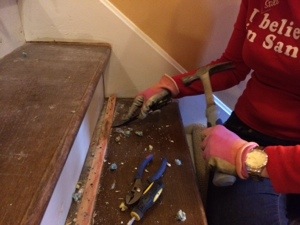
Step 1 was getting up the carpet. Pulling it up took some muscle but none like removing the tack strips, staples and nails took. I seriously pulled up what felt like a thousand. But it was all worth it!
What you need: hammer, flat mini crow bar type tool, flat head screwdriver and pliers.
You pull up the carpet, then tap crowbar under tack strip using hammer, then tap down to loosen strip. If you’re precise it will all come up in one piece along with the nails!! Left behind will be staples from the padding. A flat head screwdriver wiggled between it can pry these out usually but occasionally you might need your pliers.
Step 2: Once you’ve pulled all the staples and all out, buy a nice stainable wood filler (I used min wax in a tube) and fill all those holes.
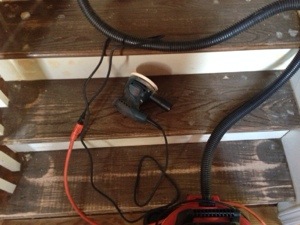
Step 3: You need an orbital sander. I got a Bosch one at Lowe’s for $70. This thing works wonders!! Also get sandpaper for it- I used 80 grit first, then 120 to smooth it out. I did 14 steps in less than 2 hours (and the risers with wood filler).
A big tip- I attached our shop vac hose to my sander and it really helped with the dust. Hardly any!
Step 4: Once sanded, vacuum the steps to get all dust and grime off. Wipe them down and allow then to dry.
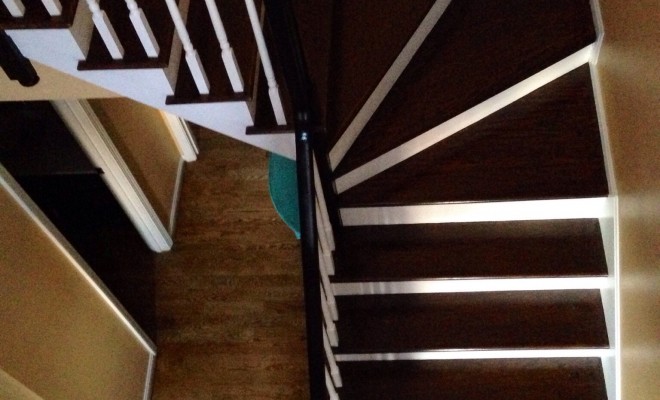
Step 5: Now it’s time to stain!! I chose dark walnut. You brush it on, wait 15 minutes then wipe what didn’t soak into the wood off. I did every other stair so we could still walk upstairs. Wait at least 4-6 hours between coats. I waited overnight as it did get darker overnight. It may take several coats to get your desired outcome.
*** Big tip- buy gel stain! My local Lowe’s didn’t sell it so I bought regular (watery, messy) stain. It didn’t stain evenly like I wanted and I ended up finding gel stain in Home Depot. It was a HUGE difference. Goes on thick like paint with a nice even color. If I’d gone with gel to begin with, I could saved myself days of work!
Step 6: Once you’ve reached your desired color, now add your polyurethane top coat- 3 coats is ideal. And let it dry thoroughly. Read directions! I’m not quite to this step yet as I keep darkening the stain. Stay tuned for final photos!
Also don’t forget to pick up some white trim paint. I’m sure at the very least you’ll have touch ups. I’m a very neat painter (no tape needed) and I made a mess with the stain, it’s very watery.
I hope this helps someone out who might be contemplating a similar project. Definitely took awhile but I’m loving it!
Now we just need our runner installed (old doggies can go up but not back down on the wood ;)), with some rods and cute finials. We will be all set!
XOXO,
Erika
P


2 Comments